Facebook Like

https://www.facebook.com/muangpuzomi

This is default featured slide 1 title

Go to Blogger edit html and find these sentences.Now replace these sentences with your own descriptions.

This is default featured slide 2 title

Go to Blogger edit html and find these sentences.Now replace these sentences with your own descriptions.

This is default featured slide 3 title

Go to Blogger edit html and find these sentences.Now replace these sentences with your own descriptions.

This is default featured slide 4 title

Go to Blogger edit html and find these sentences.Now replace these sentences with your own descriptions.

This is default featured slide 5 title

Go to Blogger edit html and find these sentences.Now replace these sentences with your own descriptions.

5/27/16

USB STICK, MEMORY CARD ထဲက မွားျပီး FORMAT ခ်မိတဲ႔ DATA ေတြကို ျပန္ယူႏိုင္တဲ႔ UNFORMAT


USB Stick, Memory Card ထဲက မွားျပီး Format ခ်မိတဲ႔ Data ေတြ ေပ်ာက္သြားတဲ့ Data ကို ျပန္ယူႏိုင္ပါတယ္။

USB Stick နဲ႔ Memory Card ေတြတင္မကပဲ  Smart Phones, MP3 Players, etc. ( including Secure Digital Card, Compact Flash Card, Memory Stick, MicroDrive, xD Picture Card, SmartMedia Card, Multi-Media Card, SDHC, Mini SD, Micro SD and more.) PC hard drives: ATA, SCSI, SATA, SSD and SAS hard drives စ,တဲ႔ Drive ေတြကေန အားလံုး ျပန္ယူႏိုင္ပါတယ္...။

Restores formatted HDD, USB & Flash drivesRecovers data from NTFS, FAT32, FAT file systems Automatic operability for user convenience Simple and well thought-out interface design Supports all Windows operating systems

Supported Media:

USB connected disks and flash drives Memory cards accidently formatted in cameras, smart phones, MP3 Players, etc. ( including Secure Digital Card, Compact Flash Card, Memory Stick, MicroDrive, xD Picture Card, SmartMedia Card, Multi-Media Card, SDHC, Mini SD, Micro SD and more.) PC hard drives: ATA, SCSI, SATA, SSD and SAS hard drives

UNFORMAT 2.5 New!

Support for large HDDs; Advanced recovery by folder/by file; Improvements in scan algorithms.

UNFORMAT Professional 2.5 New!

Includes Boot Disk Lite (bootable ISO based on Windows PE 3.1) Windows Bootable Disk Creator (Allows to create bootable disks in different format - CD/DVD/Blu-ray, USB-flash)

Supported Operating Systems:
 Win2000/2003/XP/Vista/2008 Server
 Windows 7/Windows 8 Beta.

Click Here to Download   

WINDOW ADMIN PASSWORD ေတြကို ေက်ာ္လႊားေပးမဲ့ KON-BOOT CD-USB V2.4 (NEW UPDATE)


ဒါေလးကေတာ့ သိတဲ႔သူမ်ားသိၾကမွာပါ Window Admin Password ကို အလြယ္တကူေက်ာ္ျဖတ္ေပးႏိုင္တဲ့ Software ေလးပါ .. 

ခု ေနာက္ဆံုးထြက္တဲ႔ Window 8/8.1 အထိ Support လုပ္ႏိုင္ပါတယ္.. ။

808KB ပဲ ရွိတာမို႔ ေဆာင္ထားသင့္ပါတယ္..။

All you need to enter the password-protected account Windows - is to create bootable media with Kon-Boot (or integrate into your multi-boot utility assembly that uses the loader grub), insert the media with Kon-Boot the computer / device with Windows and boot from the media. Technical diagnostics hold after repair, rescue data or to check the security system - easy, simple, quick and easy!

What's new in version v2.4?
- Windows 8/8.1 online account authorization bypass!
- Fixed few installer issues

Click Here to Download


5/26/16

Asus Zenfone 2,3,4,5,6 Pan 4.2.2 Root

ပထမဆုံး ဒီဖုိင္ေလးကုိ Download ရယူပါ။

Asus Driver – mrf#asusdriver.zip


mrf#ZenFoneRootKit.zip


ျပီးသြားရင္ေတာ့ Asus Driver ကုိ အရင္သြင္း ပါ။ Usb Debugging နဲ႕ Unknown Sources ကုိ အမွန္ျခစ္ပါ။


ျပီးရင္ ၾကိဳးထုိးပါ။ mrf#zenfonerootkit.zip ကုိ ျဖည္လုိက္ပါ။


Root.bat ကုိ Run လုိက္ပါ။


အားလုံးျပီးသြားရင္ေတာ့ မိမိဖုန္းဟာ Root ရသြားပါျပီ။

ျမန္မာစာထည့္သြင္းဖုိ့ MM Aio Font Changer Pro ကုိ Download လုပ္လုိက္ပါ။


MM Aio Font Changer Pro


5/25/16

HUAWEI ASCEND P6 FACTORY RESET


Huawei Ascend P6 ကို  PIN Lock က်ေနလို႔ပဲျဖစ္ျဖစ္ Pattern Screen Lock က်ေနလို႔ပဲျဖစ္ျဖစ္ Factory Reset ခ်ခ်င္လို႔ပဲျဖစ္ျဖစ္ ေအာက္ပါအတိုင္း အလြယ္တကူ Reset ခ်ႏိုင္ပါတယ္။

WARNING! 

(Factory Reset ခ်မွာျဖစ္တဲ့အတြက္ အထဲက DATA! ေတြ အားလံုး ပ်က္သြားမွာျဖစ္ပါတယ္)

1. Switch of the phone.

(ဖုန္းကို ပါဝါပိတ္လိုက္ပါ)

2. Press and hold: Volume Up, Volume Down and Power buttons 
together.

(Vol Up + Vol Down + Power ကို တျပိဳင္ထဲ တြဲႏွိပ္ပါ)

3. When you see the Ascend logo release only the Power button.

(Ascend ဆိုတဲ့ LOGO ေလးတတ္လာရင္ Power ခလုတ္ကို လႊတ္လိုက္ပါ)


4. This is Android System Recovery menu. Use Volume Up/Down buttons for navigation and the Power button for OK and select one after the other: 
• wipe data/factory reset
• Yes -- erase all data
• reboot system now

(Recovery Mode ကို ေရာက္ရင္ Vol UP ႏွင့္ Vol Down ကီးေတြကို အသံုးျပဳျပီး Select မွတ္ကာ Reset ခ်ႏိုင္ပါျပီ)


အဆင္ေျပပါေစလို႔

သင့္မွာ BLOG တစ္ခုရွိေနျပီလား ???


(1) သင့္မွာ blog တစ္ခုရွိေနျပီဆိုရင္

(2) blog အတြက္ domain ၀ယ္ဖို႕ ပိုက္ဆံမရွိေသးဘူးဆိုရင္

(3) ဖိုင္ေတြတင္ဖို႕ mediafire, pcloud စသည္တို႕မွာ

premium account ၀ယ္ဖို႕ ပိုက္ဆံမရွိေသးဘူးဆိုရင္

(4) သင့္အတြက္ နည္းလမ္းရွိေနပါျပီ။

(5) adfly က သင့္အတြက္ အကူအညီေပးပါလိမ့္မယ္

(6) adfly မွာ အေကာင့္တစ္ခုသာဖြင့္လိုက္ပါ။

<<<<<<<<<>>>>>>>>>

 ဒီမွာႏွိပ္ျပီး အေကာင့္ဖြင့္ပါ

<<<<<<<<<>>>>>>>>>

(8) အေကာင့္ဖြင့္ျပီးတာနဲ႕ ဆိုင္မွာ တင္ထားတဲ့ Download လင့္ေတြကုိ

adfly မွာ Short URL ေျပာင္းလုိက္ျပီး သင့္ blog မွာ ထည္႕ထားလိုက္ပါ။

(9) သင့္ရဲ႕လင့္ေတြကို လာေရာက္လည္ပတ္သူေတြ ကလစ္ႏွိပ္လိုက္တိုင္း

သင့္အတြက္ ပိုက္ဆံေတြရလာပါလိမ့္မယ္။

(10) ကလစ္ႏွိပ္သူ၏ သက္ဆိုင္ရာႏိုင္ငံလိုက္ လင့္ကို ကလစ္ႏွိပ္ျခင္း

(1000) ျပည္႕တိုင္း သင့္အတြက္ အနည္းဆံုး $1 ကေန အမ်ားဆံုး $15 ထိရရွိႏိုင္ပါျပီ။ 

(11) ဒါဆိုရင္ေတာ့ သင့္ Blog အတြက္ Domain ၀ယ္ဖို႕ file Hosting premium account 

၀ယ္ဖို႕ အတြက္ ေငြေၾကး တဖက္တလမ္းက ရလာပါလိမ့္မယ္။ တနည္းအားျဖင့္ သင့္

Blog ေလးကို ေရရွည္ ရပ္တည္ႏိုင္လာပါမည္။ 

မွတ္ခ်က္။ ယခု နည္းလမ္းသည္ စီးပြားျဖစ္မဟုတ္ပါ။

လံုး၀ လံုး၀ စီးပြားျဖစ္မဟုတ္ပါ။

adfly သည္ blogger မ်ား ေရရွည္ရပ္တည္

ရွင္သန္ႏိုင္ရန္ အကူအညီေပးေနတဲ့ ဆိုဒ္တစ္ခုပါ။

How to Recover a Hacked Facebook Account and 

1. Account ကို ေလာ့ခ်ပါ။

- browser မွာ www.facebook.com ကို ဝင္ပါ။

Forgotten password ႏွိပ္ပါ။

account ထဲမွာထည့္ထားတဲ့ mail or phone number ေရးၿပီး Search ႏွိပ္ပါ။

- account ကိုေတြ႕ၿပီဆိုရင္ www.facebook.com/hacked ကို ထပ္သြားပါ။

(ဖုန္းနဲ႔သုံးေနတာဆိုရင္ browser မွာ request desktop view / desktop site ကို အရင္ေျပာင္းပါ။)

My account is compromised ကိုႏွိပ္ပါ။

- ေနာက္ဆုံးသုံးခဲ့တဲ့ password ကိုေရးၿပီး Login ဝင္ပါ။

If you didn't remember ...... click here ဆိုတာကိုႏွိပ္ပါ။

အဲလိုမေရးထားပဲ Request new password ဆိုတာပဲေတြ႕ရင္ ေနာက္ထပ္ password အေဟာင္းတစ္ခု ထပ္ထည့္ၿပီး login ႏွိပ္ပါ။

click here ေပၚလာပါလိမ့္မယ္။

- ေရြးစရာသုံးခုေလာက္ ေတြ႕ရပါမယ္။

I didn't do this, Try logging in again, 

Reset my password, Lock my acccount

- Lock my account ကိုႏွိပ္ပါ။

Lock my account မရွိရင္ I didn't do this ကိုႏွိပ္ပါ။

ေနာက္တစ္ဆင့္မွာ lock my account ကို ထပ္ႏွိပ္ပါ။

ဒါဆို account ကို ေလာ့ခ်တဲ့အဆင့္ ၿပီးပါၿပီ။

- ေလာ့ခ်လိုက္ၿပီဆိုရင္ အေကာင့္ကို Identity verify မလုပ္ပဲ ဘယ္သူမွဝင္လို႔မရေတာ့ပါဘူး

- Just let me change my password, Reset my password, I think I'm hacked.

အဲဒီသုံးခုပဲေတြ႕ရင္ေတာ့ password change

ခံရတာၾကာၿပီျဖစ္လို႔ old password ေတြ သုံးမရေတာ့တဲ့သေဘာပါ။

========================================

2. Account ျပန္ယူတဲ့အဆင့္

- mail ပါ အခိုးခံရတာ မဟုတ္ရင္ ျပန္ယူဖို႔လြယ္ပါတယ္။ 

အေပၚကလို ေလာ့ခ်စရာေတာင္ မလိုပါဘူး။

- ကိုယ္သုံးတဲ့ mail ကို login ဝင္ပါ။

Facebook ကပို႔ထားတဲ့ password change, primary email change အေၾကာင္းၾကားစာေတြကို ရွာပါ။

- အဲဒီစာထဲက If you didn't do this, please secure your account ကို ႏွိပ္ပါ။

ဖုန္းနဲ႔သုံးတာဆိုရင္ အျမဲတမ္းသုံးေလ့ရွိတဲ့ browser ကိုေရြးဖြင့္ပါ။

- Link ကိုဖြင့္ၿပီး Continue / This wasn't me / I didn't do this တစ္ခုခုကို ႏွိပ္ပါ။

- Facebook account settings ထဲမွာ recognised လုပ္ထားတဲ့ browser ဆိုရင္ password အသစ္ေပးရမယ့္ေနရာကို ေရာက္သြားပါမယ္။

pw အသစ္ထည့္ၿပီး ကိုယ္မသိတဲ့ mail, phone, app password ေတြကို remove လုပ္၊ အရင္သုံးခဲ့တဲ့ mail ကို ျပန္ထည့္ၿပီးရင္ account ကို ျပန္သုံးလို႔ရပါၿပီ။

mail အေဟာင္းကို Facebook က လက္မခံေတာ့ရင္ back ႏွိပ္ၿပီး mail အသစ္တစ္ခုထည့္ပါ။

- Recognised browser မဟုတ္ရင္ photos of friends, security question, trusted contacts ေတြေမးပါလိမ့္မယ္။ 

ေျဖႏိုင္ရင္ ဝင္လို႔ရပါၿပီ။

မေျဖႏိုင္ရင္ Upload a photo id ကို ႏွိပ္ၿပီး မွတ္ပုံတင္၊ ယာဥ္ေမာင္းလိုင္စင္၊ passport တစ္ခုခုကို ဓာတ္ပုံရိုက္ပို႔ေပးလိုက္ပါ။

mail အသစ္တစ္ခု ထည့္ေပးဖို႔လိုပါတယ္။

ID ပို႔ၿပီး ဆက္လုပ္ရမယ့္အဆင့္ေတြကို နံပါတ္ (၃) မွာၾကည့္ပါ။

- account ကို ခ်က္ခ်င္းျပန္ဝင္မရရင္ အေပၚက နံပါတ္ (၁) မွာ ေရးတဲ့အတိုင္း ေလာ့ခ်ထားလိုက္ပါ။

========================================

3. Mail ပါအခိုးခံရတယ္ (or) mail ဝင္မရရင္

- account ကို အရင္ေလာ့ခ်ပါ။

- forgetten password ကို ျပန္ဝင္ၿပီး No longer have access to these ကို ႏွိပ္ပါ။

mail အသစ္လိပ္စာ ျဖည့္၊ Continue ႏွိပ္ပါ။

I can't login form ျဖည့္ဖို႔ေနရာကို ေရာက္ပါမယ္။

(No longer have access to these ကို ႏွိပ္လိုက္လို႔ mail အသစ္ထည့္ရမယ့္ေနရာကိုမေရာက္ပဲ No email access. Done. ျဖစ္သြားခဲ့ရင္ေတာ့ ျပန္ယူလို႔ရဖို႔မလြယ္ေတာ့ပါဘူး။

Mail ထဲကို ဝင္လို႔ရမွ အဆင္ေျပပါလိမ့္မယ္။)

- Full name မွာ account ထဲက နာမည္ကို ေရးပါ။

Link URL မွာ ေရးစရာမလိုပါ။

Select your issue မွာ Other ကိုေရြးပါ။

Mobile number မွာ +959 ေရးပါ။

Describe your issue မွာ My account was hacked. လို႔ေရးပါ။

Choose file ကို ႏွိပ္ၿပီး မွတ္ပုံတင္၊ ယာဥ္ေမာင္းလိုင္စင္၊ passport တစ္ခုခုကို ဓာတ္ပုံရိုက္ထည့္ပါ။

Send ႏွိပ္ပါ။

- ၅ မိနစ္ၾကာရင္ ကိုယ္ထည့္ခဲ့တဲ့ mail အသစ္ကို Facebook က စာပို႔လာပါမယ္။

My account was hacked. Please help me. လို႔ေရးၿပီး reply ျပန္ပို႔လိုက္ပါ။

- Facebook Team က ID ကိုစစ္ေဆးၿပီး account ထဲက info ေတြနဲ႔ ကိုက္ညီတယ္ဆိုရင္ တစ္ရက္ႏွစ္ရက္အတြင္း mail ထဲကို account unlock link ျပန္ပို႔ေပးပါတယ္။

- အဲဒီ link ကို ဝင္လိုက္ရင္ password အသစ္ေပးရမယ့္ေနရာကို ေရာက္သြားပါမယ္။

pw အသစ္ထည့္ၿပီး ကိုယ္မသိတဲ့ mail, phone, app password ေတြကို remove လုပ္၊ mail အသစ္ထည့္၊ verify code ျဖည့္ျပီးရင္ account ကို သုံးလို႔ရပါၿပီ။

========================================

အထက္ပါနည္းလမ္းေတြကို account ခိုးခံရၿပီး တစ္ပတ္အတြင္းလုပ္ႏိုင္မွ ျပန္ရပါတယ္။

ၾကာၿပီဆိုရင္ ျပန္မရႏိုင္ပါဘူး။

Old password နဲ႔ေလာ့ခ်ႏိုင္ဖို႔ အေရးႀကီးပါတယ္။

ID နဲ႔ျပန္ယူႏိုင္ဖို႔အတြက္ အေကာင့္ထဲက နာမည္၊ ေမြးေန႔ေတြ မွတ္ပုံတင္ထဲကနဲ႔ တူဖို႔လိုပါတယ္။

ခိုးတဲ့လူက နာမည္ေမြးေန႔ေတြ တလြဲေျပာင္းသြားတာ ျပသနာမရွိပါ။

သူမေျပာင္းခင္အခ်ိန္က ကိုယ္သုံးခဲ့တဲ့ old password နဲ႔ ေလာ့ခ်ႏိုင္တယ္ဆိုရင္ Fb Team က ID ကို လက္ခံပါတယ္။

အဆင္ေျပပါေစ။

playstore Error


Android ဖုန္းေတြမွာ အျဖစ္မ်ားတဲ့ Google Playstore Error Code မ်ားနဲ႔ ေျဖရွင္းနည္းမ်ား
 *********************************************************

ကုိယ္က Playstore က appliction ၁ခု download လုပ္တဲ့အခ်ိန္ Error message ေတြ က်လာၿပီး Download လုပ္လို႔မရတဲ့ အျဖစ္မ်ဳိး စိတ္ပ်က္္စရာေကာင္းပါတယ္

ဒီလိုအျဖစ္မ်ိဳးျဖစ္ရင္ေအာက္က Error Code နဲ႔တိုက္ၿပီး ေျဖရွင္းနည္းအတုိင္းေျဖရွင္းႏုိုင္ပါတယ္။

1. Google Playstore Error DF-BPA-09 (Error Processing Purchase)
********************************************

ဒီErrorက applicationတခုက္ိုDownload လုပ္တဲ့အခါမွာ ျဖစ္တတ္ပါတယ္။

ေျဖရွင္းနည္း ။ ။ ဖုန္း Settings > Application > All > Google Service Framework > Clear Data လုပ္ေပးလိုက္ပါ။ အဆင္ေျပပါေစ...

************************************************

2. Google Play Store Error Code 194
**********************************

ဒီErrorကလဲGameတုိ႔ Application တုိ႔download လုပ္တဲ့ အခ်ိ္န္အျဖစ္မ်ားပါတယ္။

ေျဖရွင္းနည္း ။ ။ ဖုန္း Settings > Applications > All > Google Play Store > Force Stop ၿပီးရင္ Clear Data လုပ္ပါ။

ၿပီးရင္Google Service Framework > Clear Dataလုပ္လုိက္ပါ။အဆင္ေျပပါေစ...

*****************************************

4. Google Play Store Error Code 941
********************************

ဒီ Errorက Google Playstore ကို update လုပ္ေနစဥ္နဲ႔ လုပ္ၿပီးအျဖစ္မ်ားပါတယ္

ေျဖရွင္းနည္း ။ ။ ဖုန္းSettings > Apps > All > Google Playstore နဲ႔ Download Manager ကို Clear Data and Clear Cacheလုပ္ၿပီး မွ Update ျပန္လုပ္ၾကည့္ပါ။အဆင္ေျပပါေစ....

***********************************************

5. Google Play Store Error Code rh01
****************************************

ဒီ Error ကေတာ့ account server နဲ႔ ခ်ိတ္ဆက္တဲ့အခ်ိန္တက္တဲ့ errorမ်ိဳးပါ။

ေျဖရွင္းနည္း ၁ ။ ။ ဖုန္းsettings > Apps > All > Google Play Store နဲ႔ Google Service Framework ကို Clear data နဲ႔ Clear cacheလုပ္ပါ။

ေျဖရွင္းနည္း ၂ ။ ။ Gmail account ကိုဖုန္းထဲမွ remove လုပ္ပါ ၿပီးလ်ွင္ဖုန္းကို restartလုပ္ၿပီး ျပန္တက္လာပါက Gmail account ကို Sign in လုပ္ေပးလိုက္ပါ။အဆင္ေျပပါေစ...

*********************************************

6. Google Play Store Error Code rpc:s-5:aec-0
******************************************

ဒီ Error ကေတာ့ account server နဲ႔ ခ်ိတ္ဆက္တဲ့အခ်ိန္တက္တဲ့ errorမ်ိဳးပါ။

ေျဖရွင္းနည္း ။ ။ ဖုန္းSettings > Apps > All > Google Play Store > Clear Cache နဲ႔ Uninstall Updatesလုပ္ေပးပါ။ Download Manager နဲ႔ Google Service Framework ကိုေတာ့ Clear Cache ပဲလုပ္လိုက္ပါ။အဆင္ေျပပါေစ...

*******************************************

7. Google Play Store Error Code 504
***********************************

ုဒီerror ကApp could not be downloaded due to an error နဲ႔ အတူတူပါပဲ။

ေျဖရွင္းနည္း ။ ။ ဖုန္းSettings > Apps > All > Google Play Store နဲ႔ Google Services Framework ကို Clear data and Clear Cache လုပ္လိုက္ပါ။ error ဆက္တက္ေနပါက gmail account ကို remove လုပ္ၿပီး ျပန္sign in လုပ္ၾကည့္ပါ။အဆင္ေျပပါေစ...

***********************************************

8. Google Play Store Error Code 491
**********************************

ဒီError ကိုု Download and update impossible ျဖစ္တဲ့ error လို႔သတ္မွတ္ႏုိင္ပါတယ္။

ေျဖရွင္းနည္း ။ ။ Gmail Account ကို Remove လုပ္ၿပီး ဖုန္းကိုrestartလုပ္ပါ။ စက္ျပန္တက္လာတာနဲ႔ account ကုိ sign in ျပန္လုပ္ေပးလိုက္ပါ။အဆင္ေျပပါေစ...

**********************************************

9. Google Play Store Error Code 498
************************************

ဒီ Error ကိုေတာ့ Interruption Of Downloads လုိေ့ခၚပါတယ္။Download လုပ္ေနရင္းနဲ႔ မၾကာခဏတက္တဲ့ errorပါ။

ေျဖရွင္းနည္း ၁ ။ ။ ဖုန္းထဲမွာ Cache file ေတြျပည့္ေနရင္ျဖစ္တတ္ပါတယ္။ သိပ္မသံုးတဲ့ application နဲ႔ မလိုတဲ့ file ေတြကိုုဖ်က္လိုက္ရင္အစဥ္ေျပႏုိင္ပါတယ္။

ေျဖရွင္းနည္း ၂ ။ ။ ဖုန္းကို power ပိတ္လုိက္ပါ ၿပီးရင္ Recovery mode ထဲကို Volume Down+Power+Home buttonေတြနွိပ္ၿပီး ဝင္လိုက္ပါ။ Recocery Mode မွာ Optionsေတြအမ်ားႀကီးရွိပါတယ္ ရွိတဲ့ optionsေတြထဲက Wipe Cache Partition ကို Volume buttonနဲ႔သြားၿပီး power keyနဲ႔ selectလုပ္လိုက္ယံုပါပဲ။အဆင္ေျပာပါေစ...

********************************************

10. Google Play Store Error Code 919
************************************

ဒီErrorကေတာ့ applicationကို download လုပ္လို႔ေတာ့ရမယ္ ဒါေပမဲ့Download လုပ္ၿပီး Runလို႔မရတဲ့errorမ်ိဳးပါ။

ေျဖရွင္းနည္း ။ ။ ရုိးရွင္းပါတယ္ သင့္ဖုန္းရဲ႕Storage ျပည့္ေနၿပီဆုိတာ သိလိုက္ပါေတာ့ ဒီေတာ့ မလိုအပ္တဲ့ data fileေတြကို ဖ်က္တာတုိ႔ Sdcardထဲ move လုပ္လိုက္တာတုိ႔ လုပ္လိုက္ယံုပါပဲ။အဆင္ေျပပါေစ...

************************************************

11. Google Play Store Error Code 921
************************************

ဒီErrorကေတာ့ aplicationေတြ download လုပ္ခါနီးမွာ အျဖစ္မ်ားတဲ့ error ပါ။

ေျဖရွင္းနည္း ။ ။ Google Play Store ကို Clear data / Clear Cache လုပ္လိုက္ပါ။ၿပီးရင္ gmail account ကို removeလုပ္ပါ။ ဖုန္းကို Restart လုပ္ၿပီး ျပန္တက္လာမွ Account ကို sign in လုပ္ပါ။အဆင္ေျပပါေစ...
 
**********************************************

12. Google Play Store Error Code 923
************************************

ဒီError ကေတာ့ Sync ပိုင္းနဲ႔ ပတ္သတ္ေနၿပီး cache memory မလံုေလာက္ရင္ျဖစ္တာမ်ားပါတယ္။

ေျဖရွင္းနည္း ။ ။ ပထမဆံုး gmail accout ကို remove လုပ္လိုက္ပါ ၿပီးရင္ စက္ထဲက မလိုပဲ memory စားေနတဲ့ application ေတြ ကို uninstall လုပ္လိုက္ပါ။ ၿပီးမွ recocery mode ထဲ သြားၿပီး Wipe Cache partition ကိုေ႐ြးေပးလိုက္ပါ။ စက္ျပန္တက္လာရင္ေတာ့ gmail sign in လုပ္လိုက္ယံုပါပဲ။အဆင္ေျပပါေစ...

*************************************

13. Google Play Store Error Code 101
*************************************

ဒီErrorကေတာ့ ဖုန္းstorage memory မေလာက္တဲ့အတြက္အျဖစ္မ်ားပါတယ္။

ေျဖရွင္းနည္း ။ ။ မသံုးတဲ့ applicationတုိ႔ Dataတုိ႔ကို Sdcard ထဲ့ေျပာင္းတာတုိ႔ delete / uninstall လုပ္လိုက္ယံုပါပဲ။အဆင္ေျပပါေစ...

****************************************

14. Google Play Store Error Code 481
************************************

ဒီ Error ကေတာ့ Google Play Store Account Error လို႔ေခၚပါတယ္။Gmail errorလို႔လဲ ေခၚပါတယ္။

ေျဖရွင္းနည္း ။ ။ Gmail account ကို remove လုပ္ၿပီး အျခား account တခုနဲ႔ sign in ဝင္လိုက္ပါ။အဆင္ေျပပါေစ...

****************************************

15. Google Play Store Error Code RPC:S-3
****************************************

ဒီ Error ကေတာ့ application downlaod လုပ္လို႔မရတဲ့ error အမ်ိဳးစားထဲပါပါတယ္။

ေျဖရွင္းနည္း ။ ။ Gmail Account ကို remove လုပ္ၿပီး တျခား account နဲ႔ sign in လုပ္လိုက္ရင္ အဆင္ေျပပါတယ္။

**********************************************

အေပၚမွာေပးထားတဲ့ Error Code ေတြကေတာ့ XDA FORUM မွာ DISCUSSION လုပ္တာအမ်ားဆံုးနဲ႔ အဆင္ေျပတဲ့ CODE ေတြျဖစ္ၿပီး တင္ေပးထားတာပါ။

USB FLASH DRIVE နဲ႔ MEMORY SD CARD REPAIR TOOL


 USB Flash Drive နဲ႔ Memory SD Card  ေတြမွာျဖစ္တတ္တဲ့ ျပႆနာေတြကို အေကာင္းဆံုး ေျဖရွင္းေပးႏိုင္တဲ႔ Repair Tool ေတြကို စုစည္းေပးလိုက္ပါတယ္..။

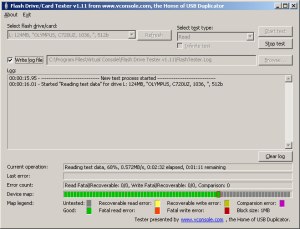
1.Check Flash Formatter

.


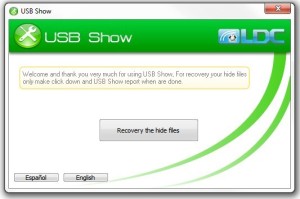
2.USB Show Software


3.Fix Unreadable File Directory software


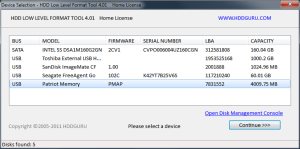
4.Low Level Format Tool


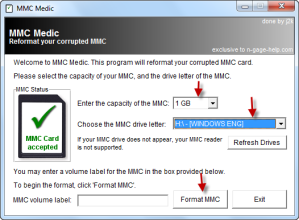
5.MMC Media Format Utility 


6.Any Drive Formatter Tool


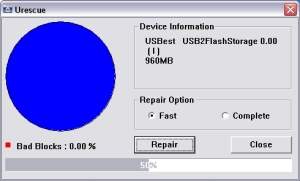
7.Urescue Format tool


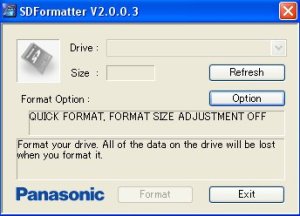
8.Panasonic SD Format Tool


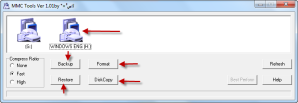
9.MMC Format Tool


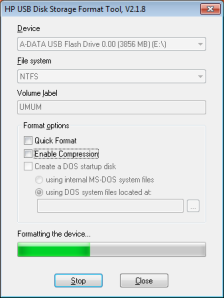
10.HP USB Disk Storage Format Tool


11. USB Flash Tester Tool


12.HDD LLF Low Level Format Tool


HDD LLF Low Level Format Tool

HDD LLF Low Level Format Tool Portable Version


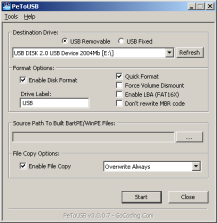
13.PeToUsb boot tool


14.USB Show Software


15.MMC Media format utility


15.MMC Media format utility


17.Panasonic SD Format tool


18.HP USB Disk Storage Format Tool


19.Urescue Format tool


20.SD Formatter 4.0 for SD/SDHC/SDXC


21. BOOTICE 2015.02.16 v1.3.3.2


For x32Bit


For x64Bit


22.  Apacer USB 3.0 Repair tool

USB Formatting Utilities


23. Create a bootable lexar  USB device


24. Skymedi SK62xx Recovery tool


25. Auto Formatter utility 


26. Corsair USB Flash Drive Chip Genius


Source: www.flashdrive-repair.com


Good Luck!