Nahun bei a nong hawh lungdam mahamh ei
Facebook Like
11/22/18
How do I change my printer settings so my Department ID auto-fills into the printer dialog box?
How do I change my printer settings for color to black and white printing?
- Click the Start button and then click Control Panel.

- Click Devices and Printers.

- Left-click on the printer icon that represents the printer you would like to set-up and then right-click on Printing Preferences.

- On the Basic Settings tab, select the “Color Mode” drop down menu item for Black and White, then click apply.

- Your printer is now configured to print in Black and White only. When the Color Mode is set to “Black and White” all print jobs will be printed in Black and White only.
5/25/16
သင့္မွာ BLOG တစ္ခုရွိေနျပီလား ???
(1) သင့္မွာ blog တစ္ခုရွိေနျပီဆိုရင္
(2) blog အတြက္ domain ၀ယ္ဖို႕ ပိုက္ဆံမရွိေသးဘူးဆိုရင္
(3) ဖိုင္ေတြတင္ဖို႕ mediafire, pcloud စသည္တို႕မွာ
premium account ၀ယ္ဖို႕ ပိုက္ဆံမရွိေသးဘူးဆိုရင္
(4) သင့္အတြက္ နည္းလမ္းရွိေနပါျပီ။
(5) adfly က သင့္အတြက္ အကူအညီေပးပါလိမ့္မယ္
(6) adfly မွာ အေကာင့္တစ္ခုသာဖြင့္လိုက္ပါ။
<<<<<<<<<>>>>>>>>>
<<<<<<<<<>>>>>>>>>
(8) အေကာင့္ဖြင့္ျပီးတာနဲ႕ ဆိုင္မွာ တင္ထားတဲ့ Download လင့္ေတြကုိ
adfly မွာ Short URL ေျပာင္းလုိက္ျပီး သင့္ blog မွာ ထည္႕ထားလိုက္ပါ။
(9) သင့္ရဲ႕လင့္ေတြကို လာေရာက္လည္ပတ္သူေတြ ကလစ္ႏွိပ္လိုက္တိုင္း
သင့္အတြက္ ပိုက္ဆံေတြရလာပါလိမ့္မယ္။
(10) ကလစ္ႏွိပ္သူ၏ သက္ဆိုင္ရာႏိုင္ငံလိုက္ လင့္ကို ကလစ္ႏွိပ္ျခင္း
(1000) ျပည္႕တိုင္း သင့္အတြက္ အနည္းဆံုး $1 ကေန အမ်ားဆံုး $15 ထိရရွိႏိုင္ပါျပီ။
(11) ဒါဆိုရင္ေတာ့ သင့္ Blog အတြက္ Domain ၀ယ္ဖို႕ file Hosting premium account
၀ယ္ဖို႕ အတြက္ ေငြေၾကး တဖက္တလမ္းက ရလာပါလိမ့္မယ္။ တနည္းအားျဖင့္ သင့္
Blog ေလးကို ေရရွည္ ရပ္တည္ႏိုင္လာပါမည္။
မွတ္ခ်က္။ ယခု နည္းလမ္းသည္ စီးပြားျဖစ္မဟုတ္ပါ။
လံုး၀ လံုး၀ စီးပြားျဖစ္မဟုတ္ပါ။
adfly သည္ blogger မ်ား ေရရွည္ရပ္တည္
ရွင္သန္ႏိုင္ရန္ အကူအညီေပးေနတဲ့ ဆိုဒ္တစ္ခုပါ။
How to Recover a Hacked Facebook Account and

1. Account ကို ေလာ့ခ်ပါ။
- browser မွာ www.facebook.com ကို ဝင္ပါ။
Forgotten password ႏွိပ္ပါ။
account ထဲမွာထည့္ထားတဲ့ mail or phone number ေရးၿပီး Search ႏွိပ္ပါ။
- account ကိုေတြ႕ၿပီဆိုရင္ www.facebook.com/hacked ကို ထပ္သြားပါ။
(ဖုန္းနဲ႔သုံးေနတာဆိုရင္ browser မွာ request desktop view / desktop site ကို အရင္ေျပာင္းပါ။)
My account is compromised ကိုႏွိပ္ပါ။
- ေနာက္ဆုံးသုံးခဲ့တဲ့ password ကိုေရးၿပီး Login ဝင္ပါ။
If you didn't remember ...... click here ဆိုတာကိုႏွိပ္ပါ။
အဲလိုမေရးထားပဲ Request new password ဆိုတာပဲေတြ႕ရင္ ေနာက္ထပ္ password အေဟာင္းတစ္ခု ထပ္ထည့္ၿပီး login ႏွိပ္ပါ။
click here ေပၚလာပါလိမ့္မယ္။
- ေရြးစရာသုံးခုေလာက္ ေတြ႕ရပါမယ္။
I didn't do this, Try logging in again,
Reset my password, Lock my acccount
- Lock my account ကိုႏွိပ္ပါ။
Lock my account မရွိရင္ I didn't do this ကိုႏွိပ္ပါ။
ေနာက္တစ္ဆင့္မွာ lock my account ကို ထပ္ႏွိပ္ပါ။
ဒါဆို account ကို ေလာ့ခ်တဲ့အဆင့္ ၿပီးပါၿပီ။
- ေလာ့ခ်လိုက္ၿပီဆိုရင္ အေကာင့္ကို Identity verify မလုပ္ပဲ ဘယ္သူမွဝင္လို႔မရေတာ့ပါဘူး
- Just let me change my password, Reset my password, I think I'm hacked.
အဲဒီသုံးခုပဲေတြ႕ရင္ေတာ့ password change
ခံရတာၾကာၿပီျဖစ္လို႔ old password ေတြ သုံးမရေတာ့တဲ့သေဘာပါ။
========================================
2. Account ျပန္ယူတဲ့အဆင့္
- mail ပါ အခိုးခံရတာ မဟုတ္ရင္ ျပန္ယူဖို႔လြယ္ပါတယ္။
အေပၚကလို ေလာ့ခ်စရာေတာင္ မလိုပါဘူး။
- ကိုယ္သုံးတဲ့ mail ကို login ဝင္ပါ။
Facebook ကပို႔ထားတဲ့ password change, primary email change အေၾကာင္းၾကားစာေတြကို ရွာပါ။
- အဲဒီစာထဲက If you didn't do this, please secure your account ကို ႏွိပ္ပါ။
ဖုန္းနဲ႔သုံးတာဆိုရင္ အျမဲတမ္းသုံးေလ့ရွိတဲ့ browser ကိုေရြးဖြင့္ပါ။
- Link ကိုဖြင့္ၿပီး Continue / This wasn't me / I didn't do this တစ္ခုခုကို ႏွိပ္ပါ။
- Facebook account settings ထဲမွာ recognised လုပ္ထားတဲ့ browser ဆိုရင္ password အသစ္ေပးရမယ့္ေနရာကို ေရာက္သြားပါမယ္။
pw အသစ္ထည့္ၿပီး ကိုယ္မသိတဲ့ mail, phone, app password ေတြကို remove လုပ္၊ အရင္သုံးခဲ့တဲ့ mail ကို ျပန္ထည့္ၿပီးရင္ account ကို ျပန္သုံးလို႔ရပါၿပီ။
mail အေဟာင္းကို Facebook က လက္မခံေတာ့ရင္ back ႏွိပ္ၿပီး mail အသစ္တစ္ခုထည့္ပါ။
- Recognised browser မဟုတ္ရင္ photos of friends, security question, trusted contacts ေတြေမးပါလိမ့္မယ္။
ေျဖႏိုင္ရင္ ဝင္လို႔ရပါၿပီ။
မေျဖႏိုင္ရင္ Upload a photo id ကို ႏွိပ္ၿပီး မွတ္ပုံတင္၊ ယာဥ္ေမာင္းလိုင္စင္၊ passport တစ္ခုခုကို ဓာတ္ပုံရိုက္ပို႔ေပးလိုက္ပါ။
mail အသစ္တစ္ခု ထည့္ေပးဖို႔လိုပါတယ္။
ID ပို႔ၿပီး ဆက္လုပ္ရမယ့္အဆင့္ေတြကို နံပါတ္ (၃) မွာၾကည့္ပါ။
- account ကို ခ်က္ခ်င္းျပန္ဝင္မရရင္ အေပၚက နံပါတ္ (၁) မွာ ေရးတဲ့အတိုင္း ေလာ့ခ်ထားလိုက္ပါ။
========================================
3. Mail ပါအခိုးခံရတယ္ (or) mail ဝင္မရရင္
- account ကို အရင္ေလာ့ခ်ပါ။
- forgetten password ကို ျပန္ဝင္ၿပီး No longer have access to these ကို ႏွိပ္ပါ။
mail အသစ္လိပ္စာ ျဖည့္၊ Continue ႏွိပ္ပါ။
I can't login form ျဖည့္ဖို႔ေနရာကို ေရာက္ပါမယ္။
(No longer have access to these ကို ႏွိပ္လိုက္လို႔ mail အသစ္ထည့္ရမယ့္ေနရာကိုမေရာက္ပဲ No email access. Done. ျဖစ္သြားခဲ့ရင္ေတာ့ ျပန္ယူလို႔ရဖို႔မလြယ္ေတာ့ပါဘူး။
Mail ထဲကို ဝင္လို႔ရမွ အဆင္ေျပပါလိမ့္မယ္။)
- Full name မွာ account ထဲက နာမည္ကို ေရးပါ။
Link URL မွာ ေရးစရာမလိုပါ။
Select your issue မွာ Other ကိုေရြးပါ။
Mobile number မွာ +959 ေရးပါ။
Describe your issue မွာ My account was hacked. လို႔ေရးပါ။
Choose file ကို ႏွိပ္ၿပီး မွတ္ပုံတင္၊ ယာဥ္ေမာင္းလိုင္စင္၊ passport တစ္ခုခုကို ဓာတ္ပုံရိုက္ထည့္ပါ။
Send ႏွိပ္ပါ။
- ၅ မိနစ္ၾကာရင္ ကိုယ္ထည့္ခဲ့တဲ့ mail အသစ္ကို Facebook က စာပို႔လာပါမယ္။
My account was hacked. Please help me. လို႔ေရးၿပီး reply ျပန္ပို႔လိုက္ပါ။
- Facebook Team က ID ကိုစစ္ေဆးၿပီး account ထဲက info ေတြနဲ႔ ကိုက္ညီတယ္ဆိုရင္ တစ္ရက္ႏွစ္ရက္အတြင္း mail ထဲကို account unlock link ျပန္ပို႔ေပးပါတယ္။
- အဲဒီ link ကို ဝင္လိုက္ရင္ password အသစ္ေပးရမယ့္ေနရာကို ေရာက္သြားပါမယ္။
pw အသစ္ထည့္ၿပီး ကိုယ္မသိတဲ့ mail, phone, app password ေတြကို remove လုပ္၊ mail အသစ္ထည့္၊ verify code ျဖည့္ျပီးရင္ account ကို သုံးလို႔ရပါၿပီ။
========================================
အထက္ပါနည္းလမ္းေတြကို account ခိုးခံရၿပီး တစ္ပတ္အတြင္းလုပ္ႏိုင္မွ ျပန္ရပါတယ္။
ၾကာၿပီဆိုရင္ ျပန္မရႏိုင္ပါဘူး။
Old password နဲ႔ေလာ့ခ်ႏိုင္ဖို႔ အေရးႀကီးပါတယ္။
ID နဲ႔ျပန္ယူႏိုင္ဖို႔အတြက္ အေကာင့္ထဲက နာမည္၊ ေမြးေန႔ေတြ မွတ္ပုံတင္ထဲကနဲ႔ တူဖို႔လိုပါတယ္။
ခိုးတဲ့လူက နာမည္ေမြးေန႔ေတြ တလြဲေျပာင္းသြားတာ ျပသနာမရွိပါ။
သူမေျပာင္းခင္အခ်ိန္က ကိုယ္သုံးခဲ့တဲ့ old password နဲ႔ ေလာ့ခ်ႏိုင္တယ္ဆိုရင္ Fb Team က ID ကို လက္ခံပါတယ္။
အဆင္ေျပပါေစ။
USB FLASH DRIVE နဲ႔ MEMORY SD CARD REPAIR TOOL

USB Flash Drive နဲ႔ Memory SD Card ေတြမွာျဖစ္တတ္တဲ့ ျပႆနာေတြကို အေကာင္းဆံုး ေျဖရွင္းေပးႏိုင္တဲ႔ Repair Tool ေတြကို စုစည္းေပးလိုက္ပါတယ္..။
1.Check Flash Formatter
.

2.USB Show Software

3.Fix Unreadable File Directory software

4.Low Level Format Tool

5.MMC Media Format Utility
.png)
6.Any Drive Formatter Tool

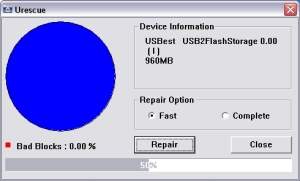
7.Urescue Format tool
8.Panasonic SD Format Tool

9.MMC Format Tool

10.HP USB Disk Storage Format Tool

11. USB Flash Tester Tool
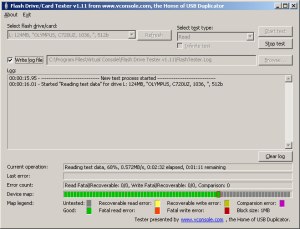
12.HDD LLF Low Level Format Tool
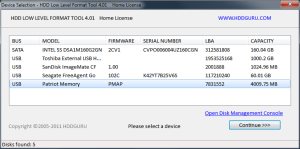
HDD LLF Low Level Format Tool
HDD LLF Low Level Format Tool Portable Version
13.PeToUsb boot tool
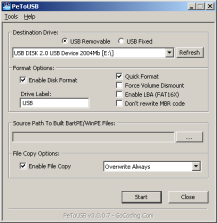
14.USB Show Software
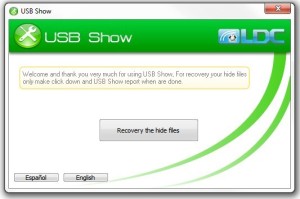
15.MMC Media format utility
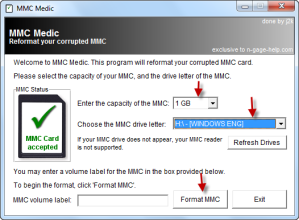
15.MMC Media format utility
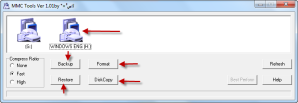
17.Panasonic SD Format tool
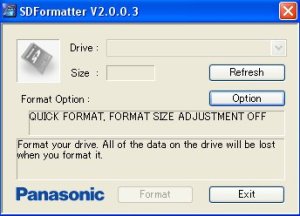
18.HP USB Disk Storage Format Tool
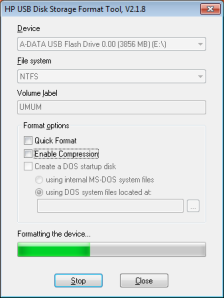
19.Urescue Format tool
20.SD Formatter 4.0 for SD/SDHC/SDXC
21. BOOTICE 2015.02.16 v1.3.3.2
For x32Bit
For x64Bit
22. Apacer USB 3.0 Repair tool
USB Formatting Utilities
23. Create a bootable lexar USB device

24. Skymedi SK62xx Recovery tool

25. Auto Formatter utility

26. Corsair USB Flash Drive Chip Genius
Source: www.flashdrive-repair.com
Good Luck!


%2Curescue%2Bdevice%2Bnot%2Bfound%2Curescue%2Bdownload%2Curescue%2Bapplication%2Ctelecharger%2Burescue.jpg)


